Why You Need a Python Automation Script
Are you tired of seeing a cluttered desktop or a “Downloads” folder filled with thousands of random files? You are not alone. Creating a Python automation script is the smartest way to reclaim your digital space without lifting a finger.
We have all been there: you open your computer, and it’s a chaotic mess of PDFs, images, installers, and random zip files. You could spend hours manually sorting them, or you could spend 10 minutes writing a simple program to do it for you forever.
In this comprehensive guide, we will build a robust Python automation script that runs in the background and keeps your digital life organized. This is a perfect project for beginners because it uses Python’s built-in libraries, meaning you don’t need to install anything complicated.
<a id=”prerequisites”></a>
Prerequisites: Setting Up Your Environment
Before we write our Python automation script, ensure you have the basics ready. If you have already set up Python, feel free to skip to the next section.
- Install Python: Download the latest version from the official Python website (External Link).
- Code Editor: We recommend using VS Code or PyCharm for their excellent debugging features.
- Basic Knowledge: You should know how to run a
.pyfile on your system.
(Internal Link Opportunity: “If you are new to coding, check out our [Beginner’s Guide to Python Syntax] first.”)
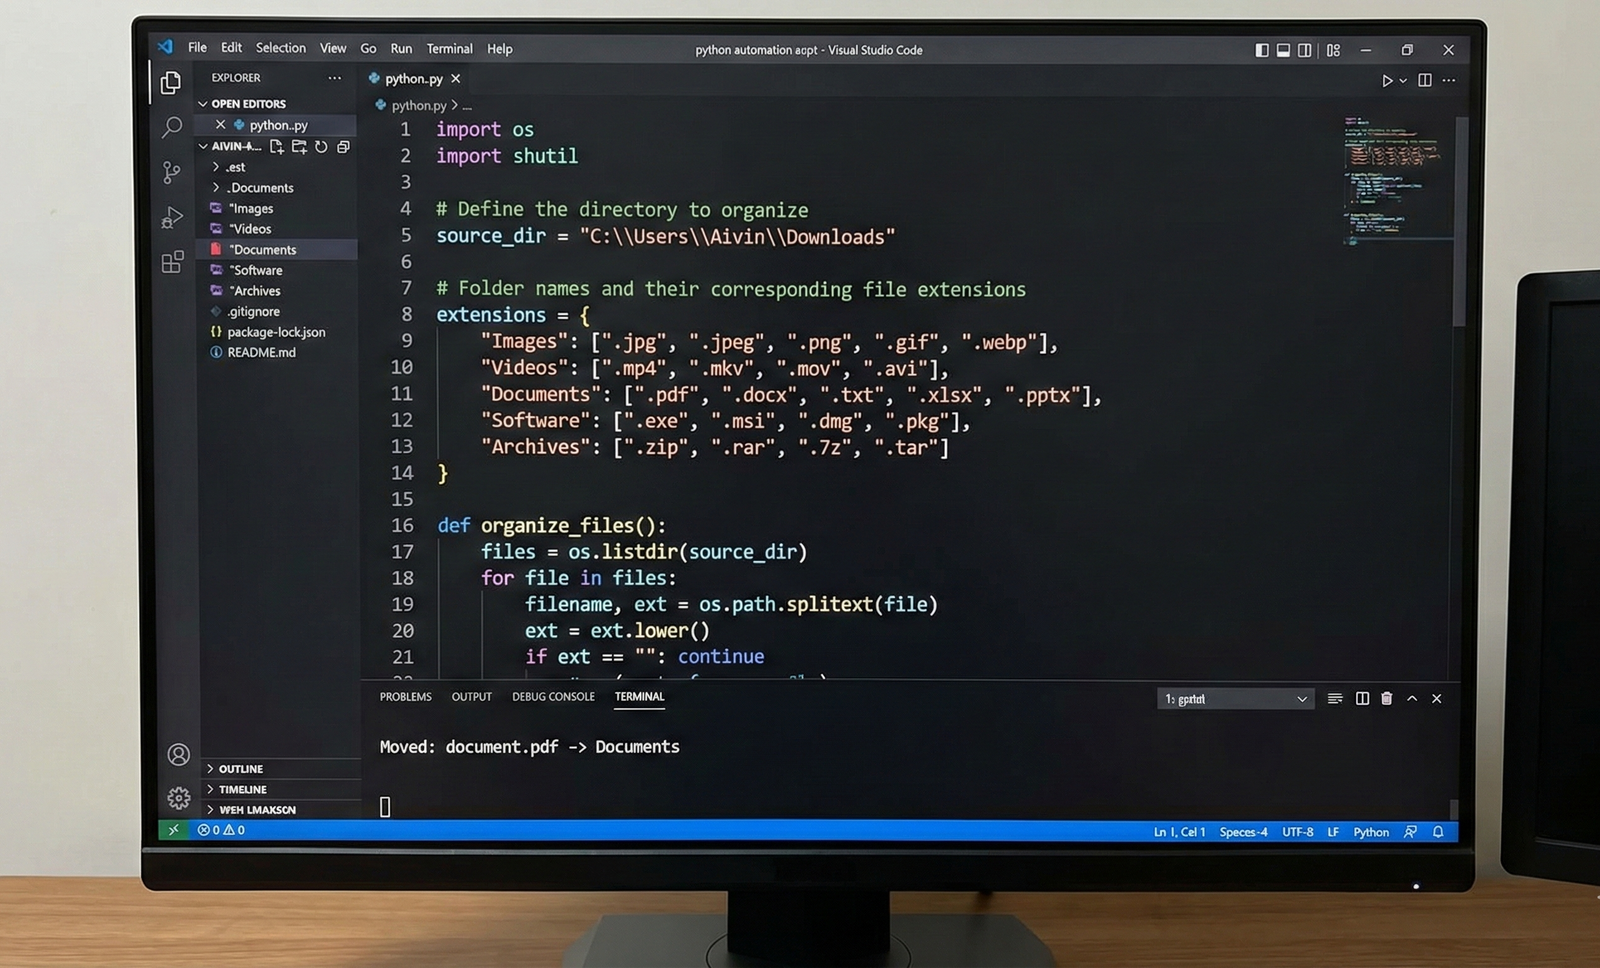
! Image Alt Text: A developer writing a Python automation script on a monitor.
<a id=”step-1″></a>
Step 1: Import Essential Libraries
To start our Python automation script, we need to import specific modules. Python is often called the “glue” language because it connects system operations easily.
We will use two powerful built-in libraries:
os: This module allows your script to interact with the operating system (finding files and paths).shutil: This module handles high-level operations on files, such as moving and copying.
Create a file named organizer.py and add the following code:
import os
import shutil

# Define the directory to organize
# Windows users: Use double backslashes like "C:\\Users\\YourName\\Downloads"
# Mac/Linux users: Use forward slashes like "/Users/YourName/Downloads"
source_dir = "C:\\Users\\Aivin\\Downloads"
<a id=”step-2″></a>
Step 2: Define Your File Categories
A successful Python automation script needs to know where to move your files. We will use a Python “Dictionary” data structure to map folder names to file extensions.
This approach makes your code clean and easy to update later. If you want to add a new category for “Music” later, you simply add one line to this dictionary.
# Folder names and their corresponding file extensions
extensions = {
    "Images": [".jpg", ".jpeg", ".png", ".gif", ".webp"],
    "Videos": [".mp4", ".mkv", ".mov", ".avi"],
    "Documents": [".pdf", ".docx", ".txt", ".xlsx", ".pptx"],
    "Software": [".exe", ".msi", ".dmg", ".pkg"],
    "Archives": [".zip", ".rar", ".7z", ".tar"]
}
<a id=”step-3″></a>
Step 3: Write the Logic Function
Now for the “brain” of our Python automation script. We need to loop through every file in our source directory and check if it matches any of our known extensions.
This function uses os.listdir() to see every file and shutil.move() to relocate it.
def organize_files():
    # List all files in the directory
    files = os.listdir(source_dir)

    for file in files:
        # Get the file extension
        filename, ext = os.path.splitext(file)
        ext = ext.lower() # Make it lowercase so .JPG and .jpg are treated the same

        # Skip if it's a directory (we only want to move files)
        if ext == "":
            continue

        # Check which category the file belongs to
        found = False
        for folder_name, ext_list in extensions.items():
            if ext in ext_list:
                # Create the destination path
                dest_path = os.path.join(source_dir, folder_name)

                # If the category folder doesn't exist, create it
                if not os.path.exists(dest_path):
                    os.makedirs(dest_path)

                # Move the file
                try:
                    shutil.move(os.path.join(source_dir, file), os.path.join(dest_path, file))
                    print(f"Moved: {file} -> {folder_name}")
                    found = True
                    break
                except Exception as e:
                    print(f"Error moving {file}: {e}")
<a id=”step-4″></a>
Step 4: Handling Errors Gracefully
When writing a Python automation script, you must anticipate errors. For example, if a PDF file is currently open in another window, Windows will not allow Python to move it. This causes a PermissionError.
In the code above, we used a try...except block. This ensures that if one file fails to move, your script doesn’t crash; it simply prints the error and moves on to the next file. This makes your automation tool robust and reliable for daily use.
<a id=”step-5″></a>
Step 5: Scheduling Your Script
A true Python automation script shouldn’t require you to click “Run” every time. You want it to run automatically.
You can modify the script to run in a continuous loop using the time library, checking your folder every 60 minutes.
import time

if __name__ == "__main__":
    while True:
        organize_files()
        print("Organization complete. Sleeping for 1 hour...")
        time.sleep(3600) # Sleep for 3600 seconds (1 hour)
Alternatively, you can use Task Scheduler on Windows or Cron Jobs on Linux to trigger this script every time you log into your computer.
! Image Alt Text: Clean and organized folders after running a Python automation script.
<a id=”conclusion”></a>
Conclusion
Congratulations! You have just built a fully functional Python automation script. Automation isn’t just about advanced AI or robots; it is about making your personal computer work for you.
By using simple libraries like os and shutil, you have saved yourself hours of future work. If you enjoyed this tutorial, consider exploring more advanced topics like Web Scraping or API integration to take your skills to the next level.
Ready to learn more? Check out our guide on [Top 5 Python Libraries for Data Science] to continue your journey.